Dry chicken breast is one of the biggest kitchen heartbreaks. You start with good intentions, but somehow the result is tough, bland, and begging for sauce. The good news? Juicy, tender chicken breast isn’t about luck—it’s about a few smart techniques that actually work.
Once you understand why chicken dries out and how to stop it, this becomes one of the easiest proteins you’ll ever cook.
Why Chicken Breast Dries Out So Easily
Chicken breast is very lean, which means:
- Almost no fat to keep it moist
- Overcooks quickly
- Loses moisture fast at high heat
The key isn’t cooking it longer—it’s cooking it smarter.
Moist chicken comes down to:
- Proper thickness
- Temperature control
- Resting after cooking
Master these, and dry chicken becomes a thing of the past.
Step 1: Start with Even Thickness
Uneven chicken cooks unevenly. The thin end dries out before the thick end is done.
Here’s the fix:
- Place the chicken breast between parchment or plastic wrap
- Gently pound the thicker side until even
- Aim for uniform thickness, not flat as paper
This small step makes a huge difference.

Step 2: Brine for Juiciness (Even a Short One Works)
Brining sounds fancy, but it’s simple—and powerful.
Quick brine method:
- 4 cups water
- 2 tablespoons salt
- Soak chicken for 15–30 minutes
What this does:
- Helps chicken retain moisture
- Seasons it from the inside
- Reduces the risk of overcooking
Rinse lightly and pat dry before cooking.
Step 3: Season Simply, but at the Right Time
Dry chicken often starts with wet chicken.
Before seasoning:
- Pat the chicken completely dry
- Use oil on the chicken, not the pan
Simple seasoning works best:
- Salt
- Pepper
- Garlic powder or paprika (optional)
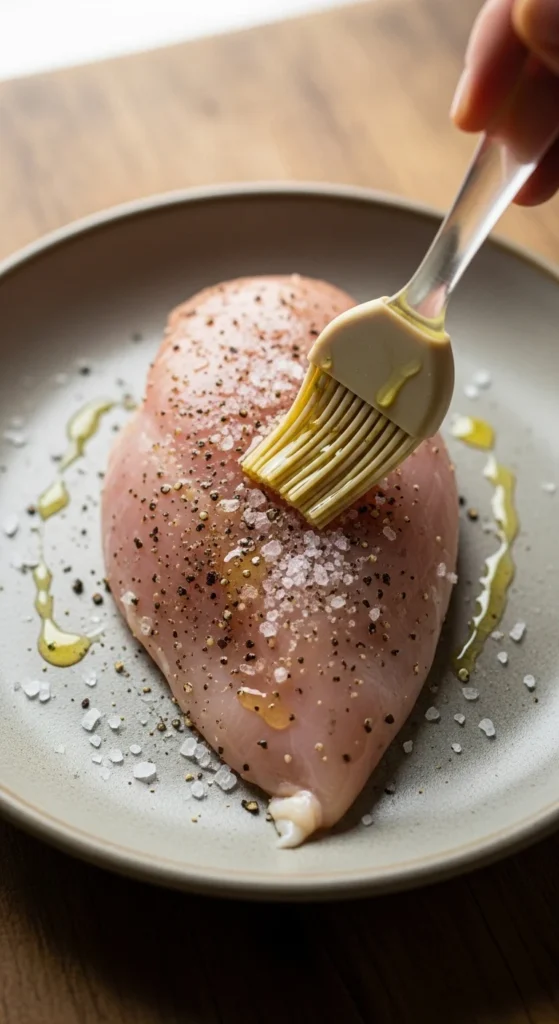
Dry surface + oil = better browning and flavor.
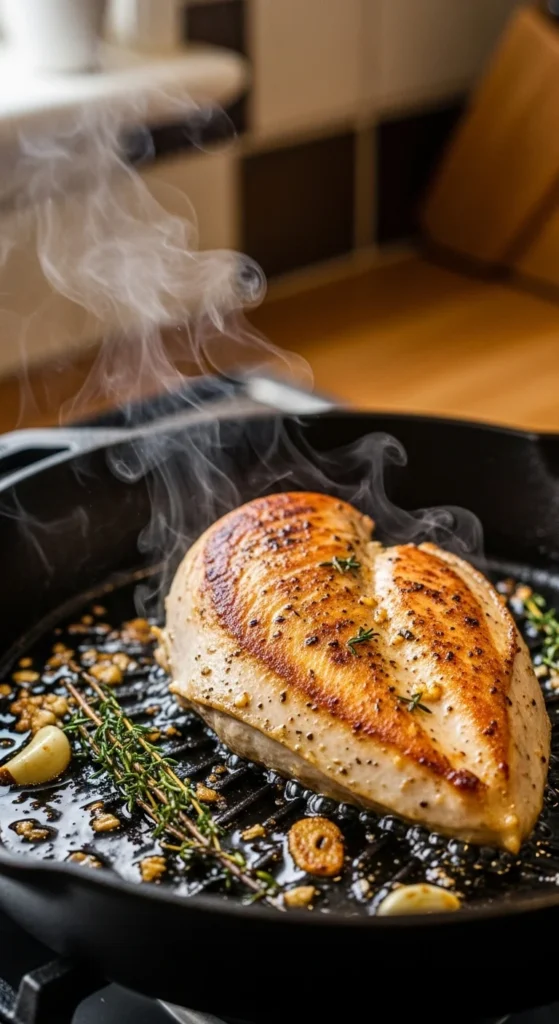
Step 4: Use Medium Heat, Not High
High heat cooks the outside too fast while the inside stays raw—then you overcook it trying to fix that.
Instead:
- Preheat pan over medium to medium-high heat
- Add chicken once the pan is hot, not smoking
- Cook undisturbed to develop a golden crust
Pan-searing timing (average size breast):
- 5–6 minutes per side
- Flip once only
Step 5: Know When It’s Done (Without Guessing)
Guessing is how chicken gets dry.
Best options:
- Instant-read thermometer: pull at 160°F (71°C)
- No thermometer? Look for:
- Firm but springy texture
- Clear juices
- No translucent center
Chicken continues cooking as it rests, so don’t wait for 165°F in the pan.
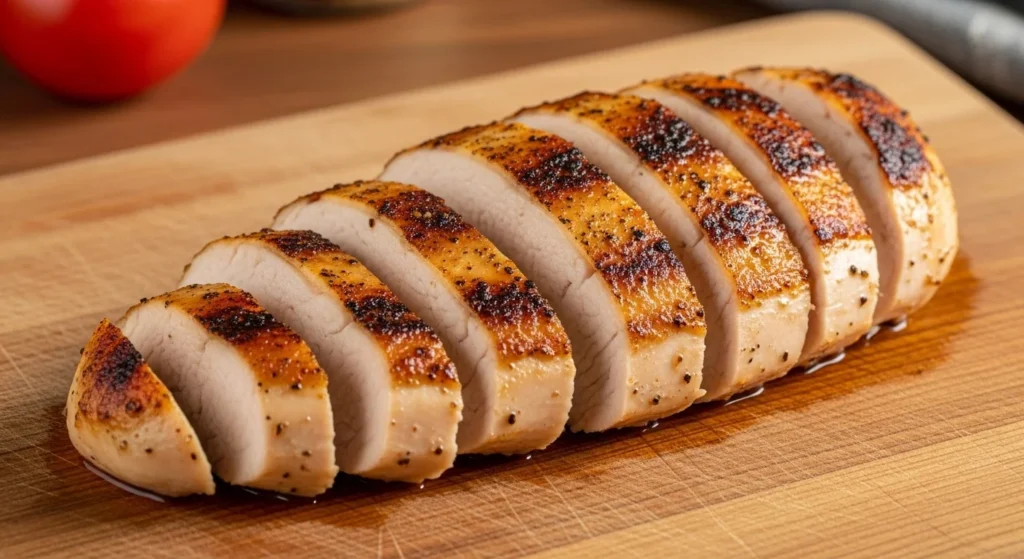
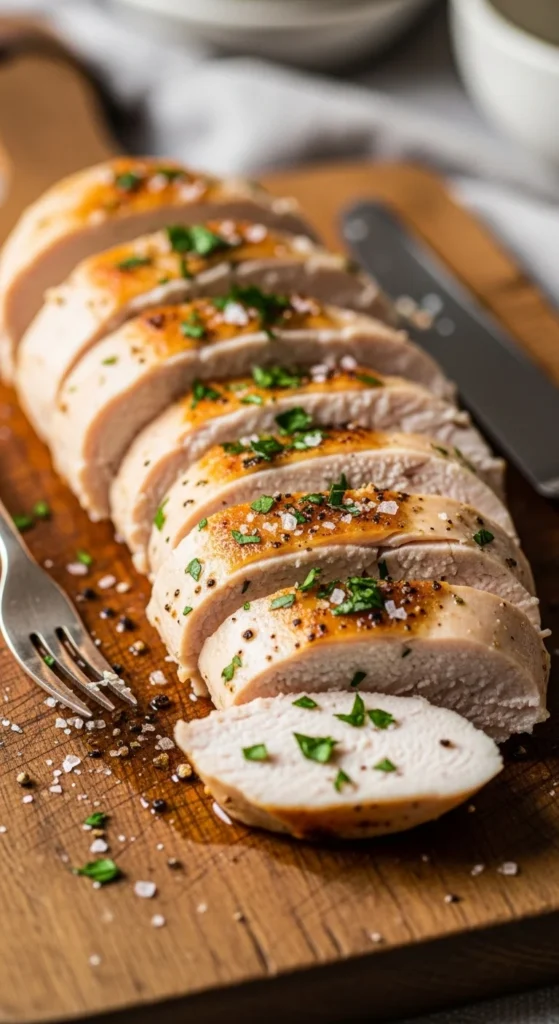
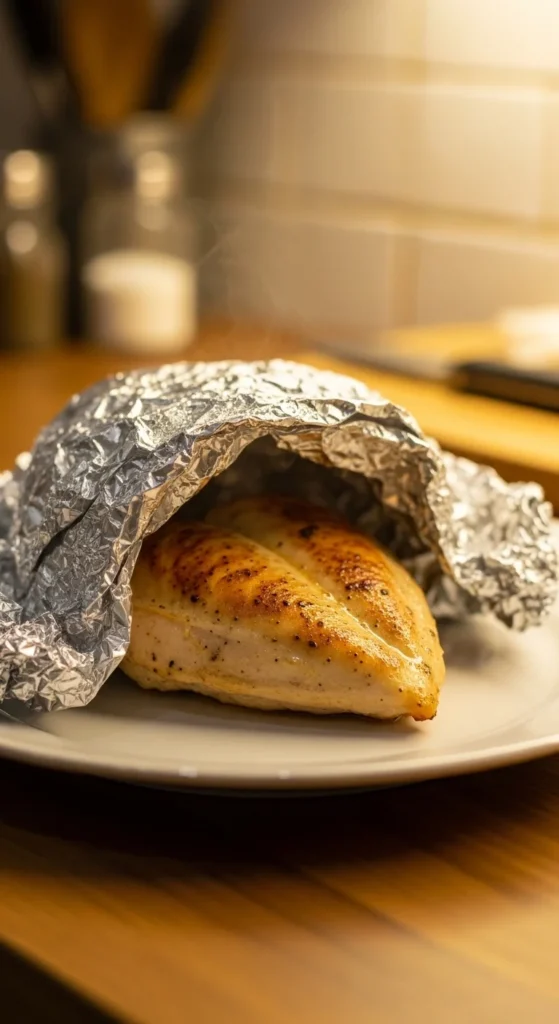
Step 6: Rest Before Slicing (Non-Negotiable)
This step is skipped more than any other—and it matters.
After cooking:
- Transfer chicken to a plate
- Rest 5–10 minutes
- Slice after resting
Resting allows juices to redistribute instead of spilling out onto the plate.
Common Chicken Breast Mistakes to Avoid
- ❌ Cooking straight from the fridge
- ❌ Using high heat the entire time
- ❌ Skipping the rest period
- ❌ Cutting immediately after cooking
Each one steals moisture.
Easy Ways to Add Flavor Without Drying It Out
Want more flavor without sacrificing juiciness?
Try:
- Finish with a squeeze of lemon
- Add a pat of butter while resting
- Slice and toss with pan juices
- Serve with a light sauce instead of overcooking
Final Takeaway
Juicy chicken breast isn’t about complicated recipes—it’s about timing, temperature, and patience. Once you cook it this way, you’ll never dread chicken night again.
Save this guide, pin it for later, and enjoy chicken breast that’s finally tender, flavorful, and never dry again. 🍗✨