Few things are as irresistible as perfectly fried chicken with a crackly, golden crust. You know the kind—crispy enough to hear the crunch, but not greasy or heavy. If your fried chicken turns out soggy, pale, or soft minutes after frying, don’t worry. You’re not alone—and it’s fixable.
The secret to crispy fried chicken isn’t just the oil or the seasoning—it’s the method . From prep to frying temperature, small details make a massive difference. Let’s walk through exactly how to fry chicken that stays crispy on the outside every single time.
Choose the Right Chicken Cuts
Not all chicken pieces fry the same way.
Best cuts for frying:
– Thighs (juicy and forgiving)
– Drumsticks
– Wings
– Boneless chicken tenders
Breasts can work, but they dry out faster and need careful timing.

Tip: Keep pieces similar in size so they cook evenly.
Season Early for Flavor That Goes Deep
Crispy coating is great—but flavor should start inside the chicken.
Season the chicken at least 30 minutes ahead with:
– Salt
– Black pepper
– Garlic powder
– Paprika or chili powder
For even better results, let it rest uncovered in the fridge for a few hours. This dries the surface slightly, helping the coating stick and crisp better.
The Coating: Your Crunch Foundation
The coating is where crispiness is born.
Classic crispy coating mix:
– All-purpose flour
– Cornstarch (key for crunch!)
– Salt
– Pepper
– Paprika
– Garlic powder
Cornstarch lightens the flour and creates that crackly texture.
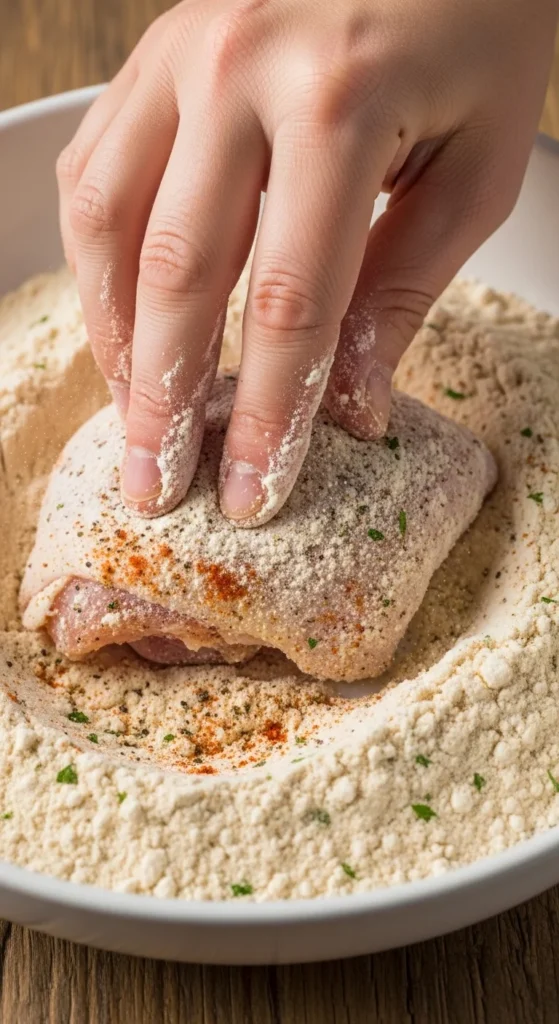
Pro coating tips:
– Shake off excess flour
– Don’t pack it on too thick
– Let coated chicken rest 10 minutes before frying (this helps the crust adhere)
Dry vs. Wet Coating: Which Is Better?
For ultra-crispy chicken, use a two-step coating :
1. Flour →
2. Liquid →
3. Flour again
Liquid options:
– Buttermilk (classic and tenderizing)
– Milk + egg
– Plain yogurt thinned with water
This layering creates flaky ridges that fry up extra crunchy.
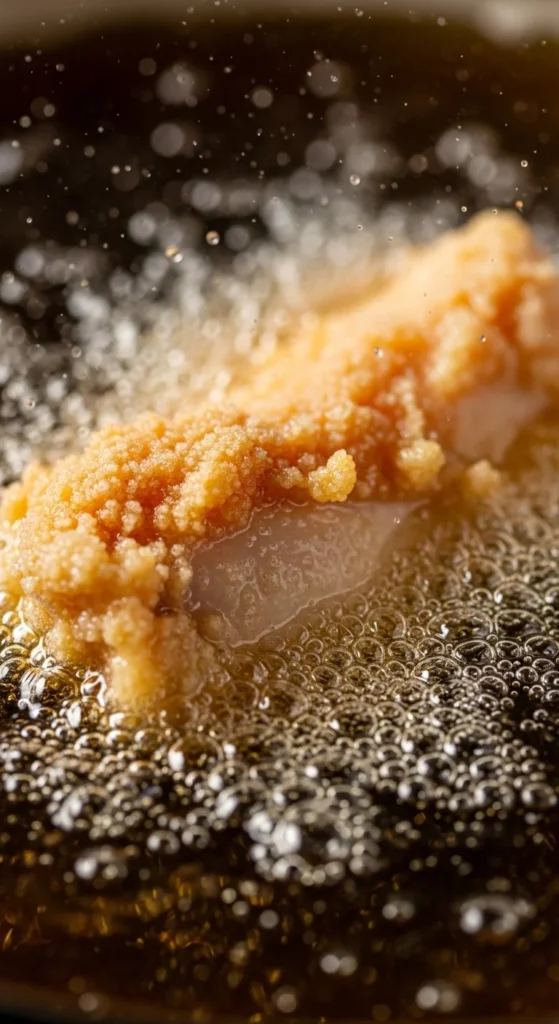
Oil Choice and Temperature Matter More Than You Think
The wrong oil or temperature can ruin everything.
Best oils for frying:
– Peanut oil
– Canola oil
– Vegetable oil
– Sunflower oil
Avoid olive oil—it burns too easily.
Ideal frying temperature: 170–175°C (340–350°F)

Too hot = burnt outside, raw inside
Too cool = greasy, soggy chicken
If you don’t have a thermometer, drop in a bit of flour—if it sizzles immediately, you’re good.
Frying Technique for Maximum Crisp
Follow these rules closely:
– Fry in small batches (crowding drops oil temperature)
– Gently place chicken away from you
– Don’t flip constantly—let crust form
– Turn once or twice only
Average frying time:
– Bone-in pieces: 12–15 minutes
– Boneless pieces: 6–8 minutes
The chicken should be deep golden brown with a firm crust.
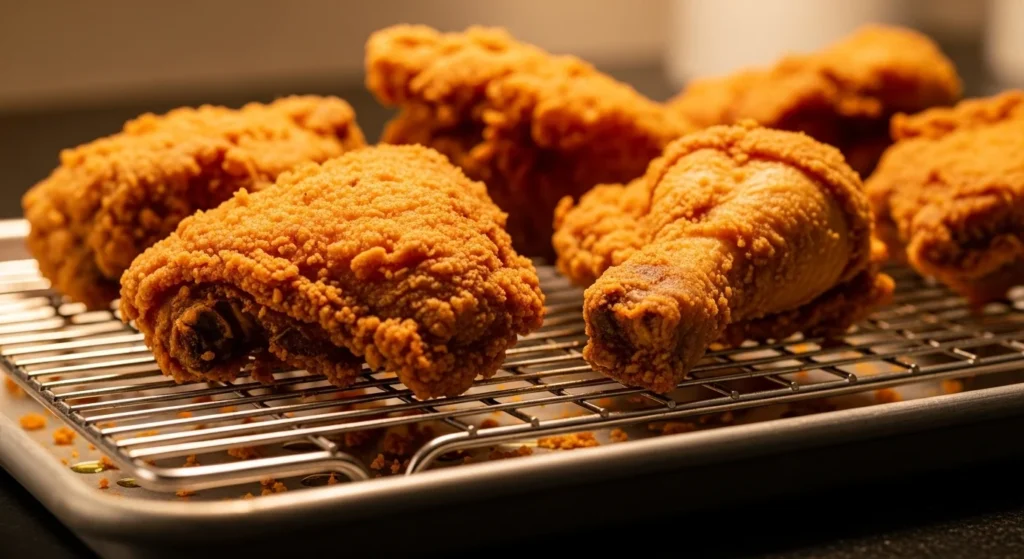
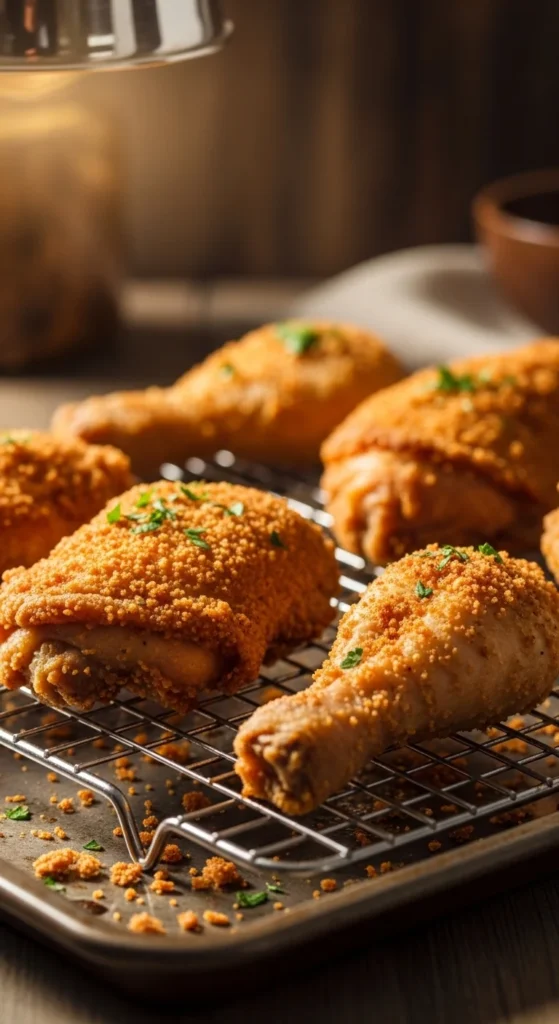
Drain the Right Way (This Is Critical)
Never drain fried chicken on paper towels—they trap steam and soften the crust.
Instead:
– Use a wire rack
– Place rack over a tray
– Let air circulate underneath
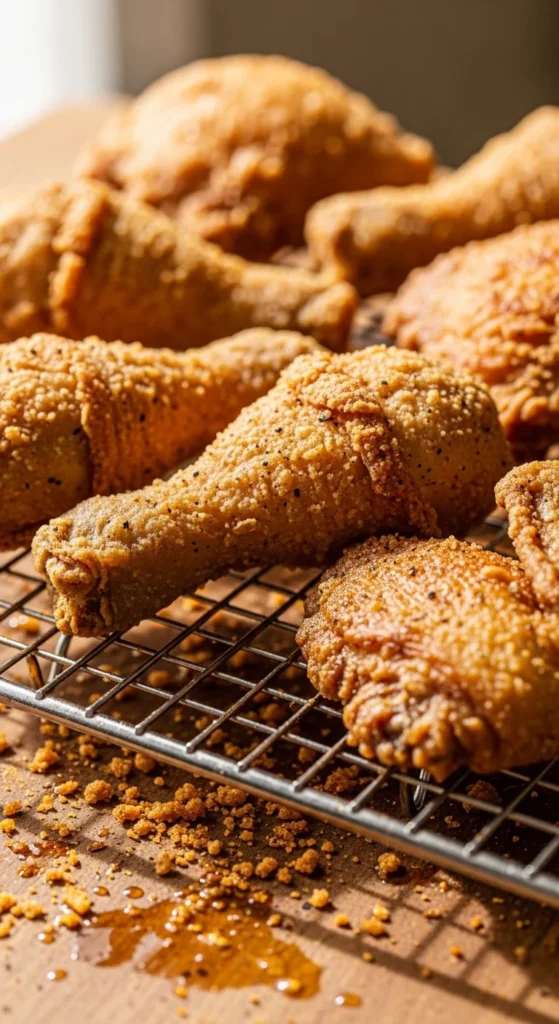
This single step keeps the outside crispy for much longer.
How to Keep Fried Chicken Crispy Longer
If you’re cooking multiple batches:
– Keep finished chicken in a warm oven (90–100°C / 200°F)
– Leave uncovered
– Don’t stack pieces
Avoid covering with foil—it creates steam.
Common Fried Chicken Mistakes to Avoid
– Skipping cornstarch
– Frying straight from the fridge (cold chicken drops oil temp)
– Overcrowding the pan
– Reusing dirty oil
– Seasoning only after frying
Each mistake steals crispiness.
Final Takeaway
Crispy fried chicken isn’t about luck—it’s about technique . With the right coating, proper oil temperature, and smart draining, you can get that golden crunch every time.
Once you master this method, soggy fried chicken will be a thing of the past.
👉 Save this guide and fry your next batch with confidence—you’ll hear the crunch before you even taste it 🍗✨